Capturing screenshots in Linux
Published October 17, 2011
Summary:I am constantly documenting all sorts of things on my computer, and recently I decided it was time to figure out what to use in Linux that will allow easy screenshot capturing which is essential for good documentation. I have used the "Snipping Tool" in Windows 7 which is a good and flexible application.
I am constantly documenting all sorts of things on my computer, and recently I decided it was time to figure out what to use in Linux that will allow easy screenshot capturing which is essential for good documentation. I have used the "Snipping Tool" in Windows 7 which is a good and flexible application. But now it's time to find something in Linux that works the same way.
By default, Fedora comes with an application called "Take Screenshot" which is located under the Applications menu under Accessories. The "Take Screenshot" utility works for basic screenshots, and can grab the whole desktop, current window, or select an area. "Take Screenshot" also has options to delay by a number of seconds, and to include the pointer and/or window border. After taking the screenshot, you can save to an image file or copy to the clipboard. While this is a very basic solution, it does work well.
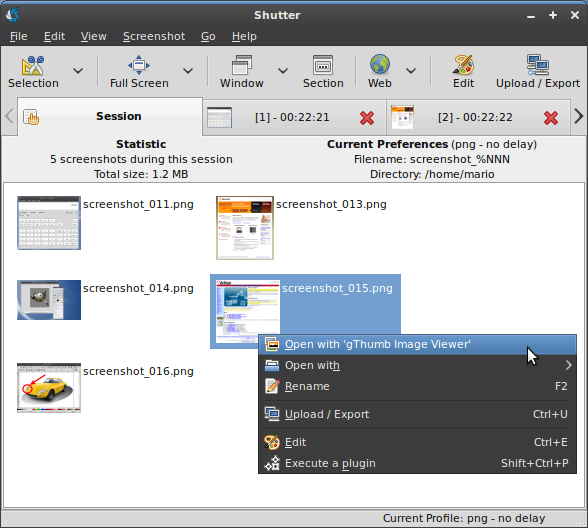
In my search, I came across another application called "Shutter". After installing it with a simple click in Fedora, I started to test around with it and soon found out that this is the champion of all screenshot capturing utilities I have ever used. It makes the "Snipping Tool" in Windows 7 look like an amateur. Shutter allows you to capture the entire desktop, a window, or a selection, just like "Take Screenshot". However, Shutter has additional options that make it a very powerful application. When taking a screenshot, it is saved in Shutter until you do something with it, and it can hold more than one screenshot. Windows 7's "Snipping Tool" cannot hold more than one screenshot at a time, which I find somewhat annoying if I want to take a series of screenshots then go through them all later. Windows 7's "Snipping Tool" cannot run more than once either (if you click New you will lose your current screenshot), so you are forced to save each screenshot as you take it. "Take Screenshot" does not hold more than one image either, although you can run it multiple times and save them all when you are done. Shutter saves all of the screenshots in a single interface, and you can easily "open with" from Shutter to send the screenshot directly to another application like GIMP, and you can also edit the screenshot directly in Shutter's own image editor (Shutter DrawingTool) which is good for doing basic modifications, like drawing arrows, adding text, etc. Then from the Shutter DrawingTool you can save the changes back to Shutter, export as a new image, send it directly to another application, or copy it to the clipboard. Shutter even has a feature to allow capturing a menu structure in any application (it's basically a timed capture but it will grab only the menu area and will put in a transparent background behind it if you have cascading menus).

Photo courtesy of the Shutter Project Website
If you need to take a lot of screenshots and edit them regularly, I highly
recommend Shutter. It's a great application. It is like the DigiKam of photo
management applications, packed with useful features. I used to think the Snipping
Tool in Windows 7 was the best I had seen for screenshot taking, however now
I know that Shutter has easily taken its place, and gives me even more productivity
on my Linux PC than ever.